
I didn't get around to sending Christmas Cards last winter so I have been determined to do something soon to send to family & friends then I first saw this on Pinterest & decided to make my own to send out to family and friends.. and guess what? I am late once again and will be mailing them on Valentines Day!! I have a serious problem.
What do you think? Cute!?

The first mustache valentine I saw was on the Craft Monkey Blog. Heidi, the author of the blog made one of her son & attached a fake mustache to the photo on her sons face so it appeared he was wearing the mustache. I loved that idea but when working with 2 kids it made it impossible & I had to change things up a bit so I just attached the fake mustache on the back of the photo w/ a glue dot & it worked perfectly!
First in order to do this I had to make Mustache's. This was pretty simple but I would have benefited a lot if I actually read Heidi's instructions in the first place... haha who would have thought that reading instructions would be less stressful!? Anyone!? ;)
This is what you will need for the Mustache's
 1. Black Felt
2. Cardboard/Paper plate
3. Marker
4. Scissors
5. Double sided tape
6. Mustache Template (Optional)
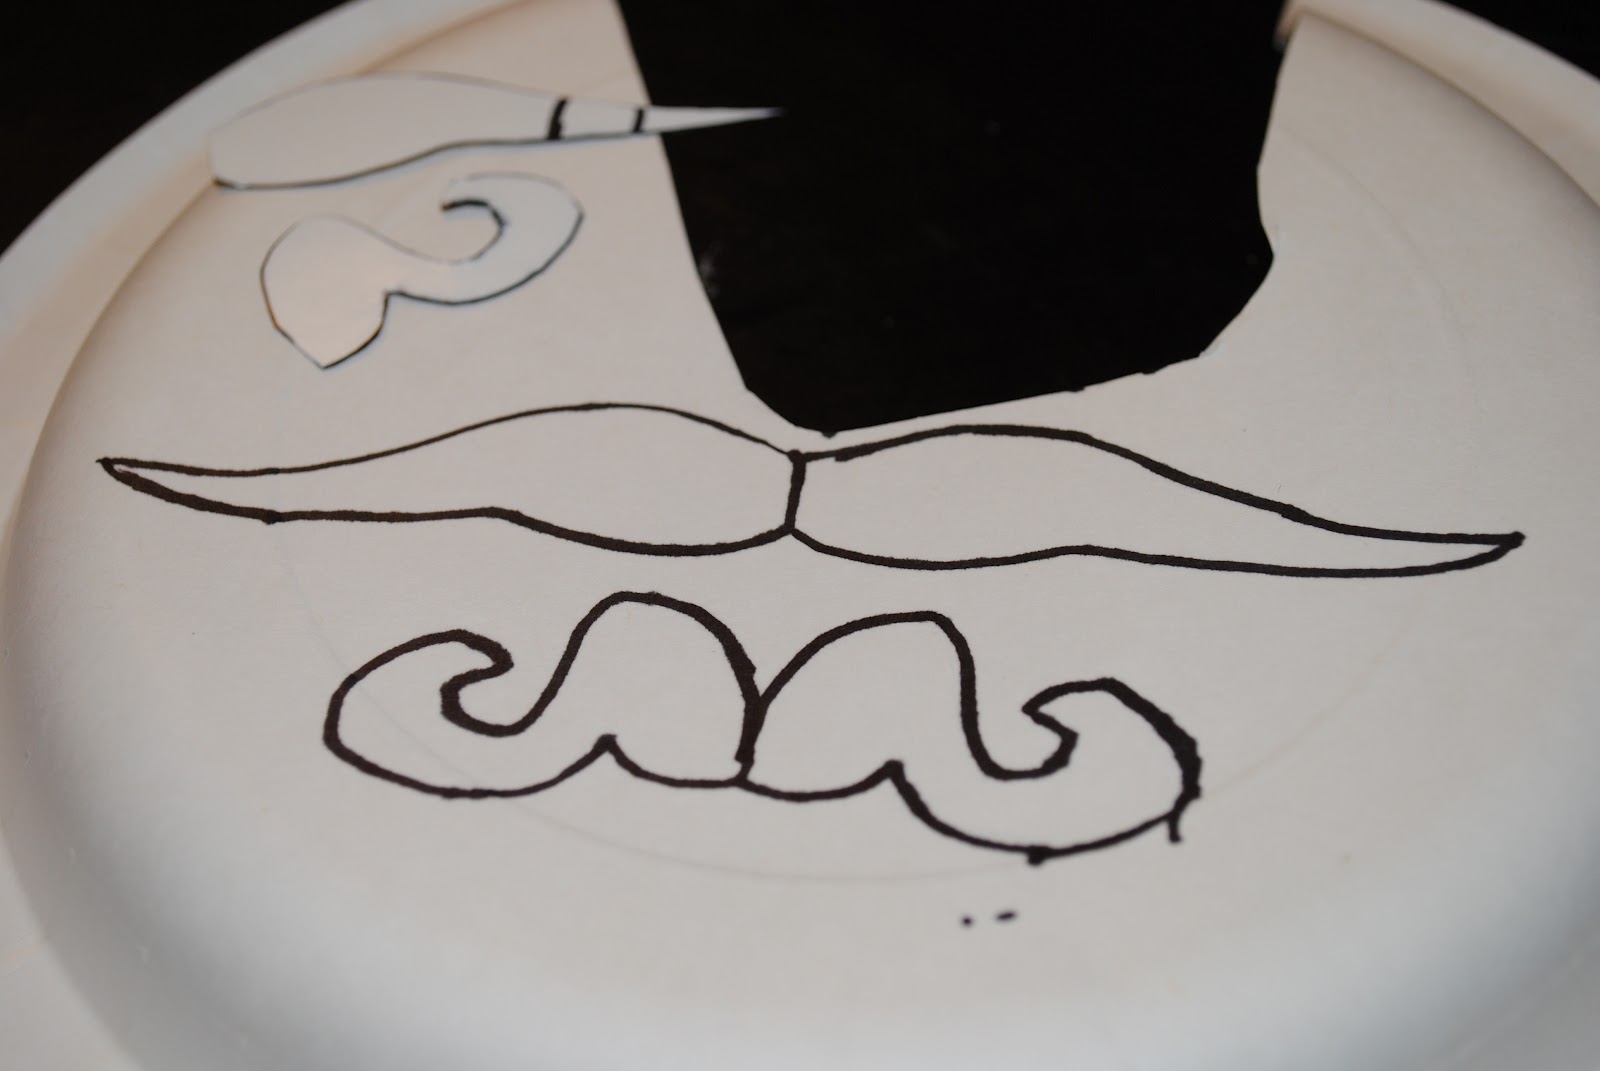
 As you can see I free handed my mustache's, I did not use a template. I did these 2 on the back of a paper plate. You will want to make 1 side of your mustache at first. When you have them drawn just the way you want them cut them out.
 Now you will want to trace your own mustache template that you just cut out.
 This way your mustache will be even on both sides. :)
 (The first 2 mustaches I made I used my kids leftover happy meal boxes to cut the mustaches out.)
Now that you have your mustache templates you will want to tape them to your black felt.
 Now you can cut them out. See not so hard to do! :)
First in order to do this I had to make Mustache's. This was pretty simple but I would have benefited a lot if I actually read Heidi's instructions in the first place... haha who would have thought that reading instructions would be less stressful!? Anyone!? ;)
This is what you will need for the Mustache's

2. Cardboard/Paper plate
3. Marker
4. Scissors
5. Double sided tape
6. Mustache Template (Optional)


Now that you have your mustache templates you will want to tape them to your black felt.

I dressed my kids up in their Valentines Day outfits & took them to the park to take some photos, we had some bad luck since I chose to take them out on a rainy day so we didn't get a lot of photos taken, this was the best & I am settling for it. My son's mustache was falling forward and every time I look at it it drives me crazy but oh well! :)
(This is the part where I wish I would have done a little more reading on Heidi's blog. She used a black felt that had a sticky back. Really? They make that? Would have been a tad easier than dealing w/ tape. )
(This is the part where I wish I would have done a little more reading on Heidi's blog. She used a black felt that had a sticky back. Really? They make that? Would have been a tad easier than dealing w/ tape. )

I used this picture (above) & edited everything on PicNik (Its Free!). Including the border, heart, & writing. Picnic is really simple to use. I love it!

I was impressed at the quality of the picture I took, it looks a little "light" because of how much I cropped it in PicNic. The quality looks better on the actual photo but my pictures were "chopped" by Walgreen's so that was a little upsetting but it is what it is and they are still fun! Maybe if I wouldn't have gotten sick & rushed things last minute I would have been a little pickier w/ the photos & prints.. so my final tip for this project... Don't wait till the last minute!!! :)
Felt: $.29/sheet (I used 2)
Glue Dots: Already had them
Double Sided Tape: Had it on hand.
Photo Prints: $.19/each @ Walgreen's
You could definitely get prints cheaper if you plan ahead or take the time to go to Wal*Mart & use their "instant" machines. I believe they are $.9/photo
So as you can see this project did not cost much at all, is very creative and a whole lot of fun for your kids.
No comments:
Post a Comment